Relatively few American gardeners have even heard of coppicing and most probably don’t even know what it is. However most have probably noticed the phenomenon behind it; that when you cut down many deciduous trees (it doesn’t work with most conifers) their roots remain alive and send up a ring of vigorous new shoots (known as suckers) around the stump (known as a stool). They probably look upon this as a bad thing though, and are then interested in finding an easy way to kill the root. In my opinion this is the wrong approach, though of course it depends upon why you cut down the tree in the first place. If these stools are left alone (and not eaten by deer) the shoots (suckers) will grow rapidly and can eventually be put to use (leave them long enough and the tree will grow back).
Coppicing makes use of this ability to regenerate and gives you a way to control the size of your trees. This enables you to coexist with trees that cast a lot of shade, rather than killing them. You can simply coppice it and keep it as a shrub instead. You can even allow it to grow back into a tree at a later date, if circumstances change. If done carefully coppicing doesn’t hurt the tree at all and may actually extend its life be periodically rejuvenating it.
I should add that re-growth isn’t guaranteed; occasionally you cut a deciduous tree and it doesn’t grow back. The ability to sucker depends upon the species, the health of the tree and the size of the tree. Younger trees sprout vigorously, while the large stools of older trees sometimes rot and die.
Coppicing also provides useful products for the garden. You can cut the growing shoots whenever they reach a useful size (anywhere from 1 –30 years depending upon the species and climate) and the process will begin all over again. The wood produced has a variety of uses depending upon when it is cut. The slender shoots of willow are harvested after only one or two years for use in making baskets. Larger shoots and small poles can be cut in three to five years for garden supports, while older wood can be used for fence posts or as firewood.
Coppicing is an important forestry management tool in many parts of the world (anywhere trees aren’t abundant), because it is the best way to get maximum production of wood from an area. Unlike newly planted seedlings, the new shoots are growing from established roots, so re-growth is extremely vigorous (shoots may grow 10 feet in a season).

A Redwood stool after one year
Coppicing can also be used to control the size of shrubs, in fact it is even more reliable with them because that is how most grow naturally. When you cut shrubs down to ground level they will send up a new set of shoots that are even straighter, cleaner and better looking than the previous ones and these can be used around the garden as supports or chipped as a source of biomass for mulch.
When I built my house all of the trees and shrubs (Ceanothus, Elder, Manzanita, Coffeberry, Oak, Walnut, Chestnut and Redwood – one of the few conifers to coppice) in the immediate area of the house were cut to the ground, but most ultimately sprouted back up. This was helpful in landscaping as it gave me a nice random natural pattern of fast growing plants, which I incorporated into the garden.
My land is fairly wooded and I have coppiced quite a few of the trees to admit more light, including several small (relatively) Redwoods. They were on the south side of the garden and seriously shading the area where I wanted to put annual vegetables. I would feel guilty about cutting down something that could potentially live 20 times as long as I will, so this was a great solution. If I leave here and someone who doesn’t like gardening moves in (which would be a shame), the redwoods can grow back again.
Here are some trees that should coppice well:
Alder, Basswood, Beech, Birch, Cherry, Chestnut, Cottonwood, Eucalyptus, Hackberry, Hickory, Honey Locust, Oak, Maple, Mesquite, Persimmon, Plum, Poplar, Redwood, Sassafras, Walnut, Willow.

Shoots emerging from a newly cut Chestnut stool

The same stool after one years growth

Same stool after 2 growing seasons

Same stool after 2 growing seasons
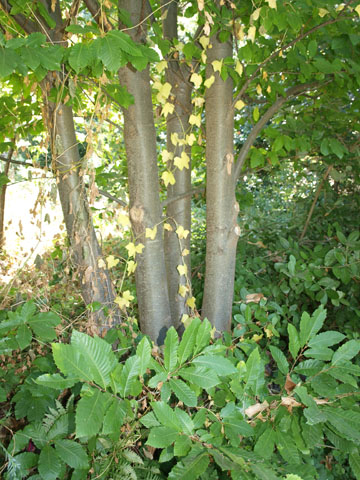
Seven year old Chestnut coppice


